Tools Class Doesn't Teach You
The command line, SSH, Vim, tmux, and Git: the everyday tools most courses assume you already know.
Programming courses teach you a language. They rarely teach you the tools professional developers use around that language every day: the shell, remote access, a terminal editor, window management, version control. Those tools are what make the difference between fighting your computer and having it work for you.
Everything here is language-agnostic and free. Work through it in order if you’re starting out, or skip to whatever you need.
On this page
Getting a Linux shell
Nearly everything below assumes you have a Linux shell in front of you. You have several ways to get one, and none of them require giving up the operating system you already use.
Run Linux in a virtual machine. The safest option, and the easiest to undo. Your existing OS keeps running, and Linux runs in a window on top of it. If you break something, you delete the VM and make another one. See Containers & Virtual Machines for how to set this up.
Windows Subsystem for Linux (WSL). If you’re on Windows, this is the lowest
friction path: a real Linux environment, no VM to manage, and it shares your
filesystem. Open PowerShell as administrator and run wsl --install. Microsoft’s
install guide covers the
details. Nearly everything on this page works in WSL.
Dual boot. Install Linux alongside Windows and pick one at startup. You get full hardware performance and a real Linux desktop, at the cost of rebooting to switch and a partitioning step where mistakes are expensive. Back up first.
Install Linux as your only OS. What I run. Best experience if you’re ready for it, and the most disruptive if you’re not.
On a Mac? You already have a Unix shell. Open Terminal. It behaves very much like a Linux shell.
Mac users
The primary difference is that the apt package manager is not an option. Use
Homebrew instead, or do a web search for the equivalent
command.
Want a thorough introduction? The Linux Foundation offers a free course: https://training.linuxfoundation.org/training/introduction-to-linux/
The Linux shell
Why this is worth your time
When you use a computer, you are probably looking at Windows or macOS. When your code runs, it is almost certainly running on Linux.
That is not an exaggeration. W3Techs measures the server operating system of the sites it surveys at roughly 92% Unix-like, overwhelmingly Linux, against about 8% Windows. Every major cloud provider defaults to Linux images. Android is built on the Linux kernel. Docker containers are Linux. Most continuous integration runners are Linux. Your home router, your car’s infotainment system, and the machines in the campus lab are running it too.
Here is what that means for you in practice. The moment you do anything beyond running code on your own laptop, you end up at a Linux prompt: deploying a web application, connecting to a lab machine, working out why a container will not start, or showing up on the first day of a job.
To be fair, you can avoid the shell for a surprisingly long time. AWS, Google Cloud, and Azure all have web consoles that will do most of what a terminal can do, and they are genuinely useful when you are learning what the pieces are. But clicking through a console is slow, it is hard to describe to a co-worker, and it is nearly impossible to repeat exactly. The shell is faster once you know it, and far more importantly, everything you do in it can be saved in a script, put in a repo, reviewed, and run again next month by someone else. That is the difference between doing a task and automating it, and automation turns out to be most of the job.
There is also a point past which the console runs out. Once you connect to the server itself, there is usually no graphical desktop installed on it, and you work with what the shell gives you.
The shell also earns its keep on your own machine:
- It is more flexible than a GUI program. Once you have learned the commands, it is faster too.
- It uses fewer resources, which matters a great deal when you are working on a remote machine over a slow connection.
- It is available on almost any system, so the skill travels with you.
- It is where automation starts. Anything you can type, you can put in a script and never type again.
- You can control entire cloud deployments on Google Cloud and AWS from it.
One more argument, and to me it is the strongest. Frameworks and languages come and go. Bash has been in use since 1989, and the commands you learn this week will still work in twenty years, on hardware that does not exist yet. Very few things you can study give you that kind of return.
Bash also consistently ranks among the most widely used languages in the Stack Overflow developer survey, which is worth noticing given that nobody sets out to “learn Bash.”
Terminal emulators and customizing the terminal
One of the properties of a typical Linux distribution is that you can customize almost anything, and the terminal is no different. You can change the look and behavior of the terminal. This link shows instructions on how to customize the Linux terminal.
If the basic terminal that comes with your distribution is not adequate for your needs, you are not stuck with it. You can install a different terminal emulator and use it instead. Here is a list of terminal emulators. Before I switched to a tiling window manager, I liked using the Terminator terminal emulator.
SSH and remote machines
Secure Shell (SSH) is a method to securely remote login from one computer to another. All communications between the local and remote machine are encrypted. The most common implementation found on systems comes from the open source OpenSSH.
This is how you reach essentially every machine that is not sitting in front of you: a cloud server, a lab machine on campus, a Raspberry Pi in your closet.
A worked example
The basic form of the command is a username, an @, and the address of the
machine you want to reach:
ssh dpouliot@server.example.edu
Read that as “log in to server.example.edu as the user dpouliot.” If your
username on the remote machine is the same as the one on your own machine, you
can leave off the dpouliot@ part and SSH will assume it.
The first time you connect to a machine, you will see something like this:
The authenticity of host 'server.example.edu (203.0.113.10)' can't be established.
ED25519 key fingerprint is SHA256:V1XoP0kCyEuAcTL2sBSNtpEgOMvhaRnjBNiCbEjPZ2s.
Are you sure you want to continue connecting (yes/no/[fingerprint])?
This is worth understanding rather than reflexively typing yes. Every SSH
server has its own key, and your machine has never seen this one before, so it
is asking whether you trust it. Answering yes stores the key in
~/.ssh/known_hosts. From then on, your machine checks that the server presents
the same key every time. If it ever changes, SSH refuses to connect and warns
you loudly, because a changed key can mean someone is impersonating the server.
In practice it usually means the server was rebuilt, but the whole point is that
you get told rather than quietly connected to the wrong machine.
After that you are asked for a password, and then you are simply at a shell prompt on the other machine. Everything you type runs there, not on your laptop. When you are finished:
logout
You can also run a single command on the remote machine without staying logged in, which is the piece people usually discover late:
ssh dpouliot@server.example.edu 'df -h'
That connects, runs df -h to check disk space, prints the result on your
screen, and disconnects. Commands like that are what shell scripts are made of.
Ports
Sometimes a server does not listen on the standard SSH port, which is 22. The
-p flag says which port to use instead:
ssh -p 2220 bandit0@bandit.labs.overthewire.org
That is exactly the command you will use for the Bandit wargame later on this
page. Now you know what the -p 2220 is doing.
Keys instead of passwords
Typing a password for every connection gets old, and passwords are the weaker option. The better approach is a key pair: a private key that stays on your machine and a public key that you install on the server. Generate one with:
ssh-keygen -t ed25519
Press Enter to accept the default location (~/.ssh/id_ed25519), and choose a
passphrase when it asks. That produces two files: id_ed25519, the private key,
and id_ed25519.pub, the public key. Then copy the public half to the server:
ssh-copy-id dpouliot@server.example.edu
It will ask for your password one last time. After that, ssh
dpouliot@server.example.edu logs you in without one.
There is a lot more to say about SSH keys than fits here. For more information:
- GitHub’s guide to generating a new SSH key is the most practical walkthrough, it covers Linux, Mac, and Windows, and you will need exactly this to push code to GitHub over SSH.
- The ssh-keygen manual page is the
authoritative reference for every option, including the key types available
and why
ed25519is a good default. - The SSH Academy article on ssh-keygen covers the same ground at more length, with background on how key authentication works.
You can also read the manual page without leaving your terminal, which is the habit worth building:
man ssh-keygen
Never share the private key
The .pub file is the one you hand out, and it is safe to publish. The file
without the extension is your private key. It never leaves your machine, never
gets emailed, and never goes in a Git repo. Anyone who obtains it can log in as
you.
Copying files
scp copies files over the same connection, using the same user@host form
with a colon before the remote path:
scp report.pdf dpouliot@server.example.edu:/home/dpouliot/
scp dpouliot@server.example.edu:/home/dpouliot/results.csv .
The first line sends a file up. The second brings one back, with . meaning
“into the directory I am in right now.” For anything large or repeated, look at
rsync, which transfers only what changed.
Saving your connections
Once you connect to the same machines regularly, put them in ~/.ssh/config:
Host lab
    HostName server.example.edu
    User dpouliot
    Port 22
Now ssh lab does the whole thing. scp file lab: works too. It is a small
thing that removes a surprising amount of daily friction.
Try it
You do not need a server of your own to practice. Generate a key pair with
ssh-keygen, look at both files with cat, and notice that the public one is a
single line you could safely paste anywhere. Then run
ssh -p 2220 bandit0@bandit.labs.overthewire.org with the password bandit0
and read the host key prompt carefully before answering it.
Mosh
Mosh is a replacement for SSH. It was created to deal with poor connections between the local and remote machine. Visit the site and decide if you want to install Mosh on your machine.
A quick tour of the shell
Open up a Linux shell and follow along. Type the commands yourself. Reading them does not build the muscle memory.
To see where we are in the file system, let’s use the pwd command (print
working directory):
david@david-HP-Z820-Workstation:~$ pwd
/home/david
This is the home directory for this user.
To see the files and directories located in the home directory, type in the
ls command. This lists the files and directories, but may not include all of
them. To see the hidden files, add the a flag:
ls -a
Now we will see even hidden files and folders.
Want to see what other flags you can use with ls? Use the man (manual)
command:
man ls
You can also install programs from the command line using the package managers.
For example, let’s install the cowsay program:
sudo apt install cowsay
The sudo command tells the OS to run this as the root user. apt install
installs the program using the aptitude package manager.
Let’s try running the cowsay program:
cowsay hello
You might get an error message like this:
$ cowsay hello
Command 'cowsay' is available in '/usr/games/cowsay'
The command could not be located because '/usr/games' is not included in the PATH environment variable.
cowsay: command not found
If you received this error message, this happened because the operating system
does not know where the cowsay program is installed. (You might not have gotten
this error.) Let’s find its installation location using the find command:
find / -name 'cowsay'
In the command above, find is the command, / is an argument telling which
directory to start the search. / is the root directory. -name 'cowsay'
searches for the name cowsay.
After running the find command, we see that the cowsay program is installed at
/usr/games/cowsay. Now we can run the program using its full path:
$ /usr/games/cowsay hello
 _______
< hello >
 -------
        \   ^__^
         \  (oo)\_______
            (__)\       )\/\
                ||----w |
                ||     ||
This can get tedious using the full path. Fortunately Linux systems have a PATH
variable. The PATH variable is an environment variable that contains an ordered
list of paths that Linux will search for executables when running a command.
Using these paths means that we do not have to specify an absolute path when
running a command.
To see what is in the current PATH variable, let’s use the echo command:
echo $PATH
The $ is bash syntax for a variable. The echo command displays to the
terminal screen. So this command is telling the terminal to print what is in the
PATH variable to the screen.
To add the cowsay program to our path, we can simply update the variable:
PATH="$PATH:/usr/games/"
This command takes the current PATH variable and appends :/usr/games/ to it.
Now if we check the PATH variable again, we can see :/usr/games is added to
it.
However this will only last as long as the current shell session. When you close
your terminal, it will revert to the previous version of the PATH variable. To
make this change persistent, we need to modify the .bashrc file. To do this, we
first go to our home directory:
cd ~
Then let’s make sure the .bashrc file is here:
ls -a
Let’s open a text editor inside our shell to edit this file:
nano .bashrc
Inside the nano text editor, add this line to the bottom of the file:
export PATH="$PATH:/usr/games"
Save the file using Ctrl+O, then exit with Ctrl+X. To get the terminal to read the updated file, type in:
source ~/.bashrc
This reloads this file and updates the PATH variable. Now we don’t need to use
the full path, and our change is persistent if we close the terminal and open a
new one.
Try it
Get the cow to think your name:
 _______________
< David Pouliot >
 ---------------
        \   ^__^
         \  (oo)\_______
            (__)\       )\/\
                ||----w |
                ||     ||
Then read the man page for cowsay and work out how to:
- Change the cow’s eyes to any characters you want.
- Use a different animal. There are many to choose from.
 _______________
< David Pouliot >
 ---------------
 \     /\  ___  /\
  \   // \/   \/ \\
     ((    O O    ))
      \\ /     \ //
       \/  | |  \/
        |  | |  |
        |  | |  |
        |   o   |
        | |   | |
        |m|   |m|
Reading a man page to answer your own question is the actual skill here. The cow is just an excuse to practice it.
Practice: Bandit on OverTheWire
The Bandit game at
OverTheWire is a capture-the-flag game that
gives a good introduction to the Linux shell. In each level, you have to beat the
level to find the password to the next level. To start, visit the page to read
the instructions, then in a terminal, ssh into level 0:
ssh -p 2220 bandit0@bandit.labs.overthewire.org
Note the use of the -p 2220. This is telling the ssh program to use port 2220
instead of the standard SSH port.
Use password bandit0 for the first level. For all the other levels, it is up to
you to find the password. To exit from an ssh connection, use the logout
command.
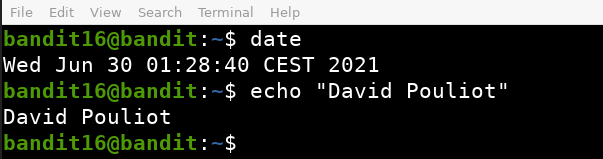
Try it Solve the levels up through Bandit Level 11 → Level 12. When you’re logged into bandit12, your terminal should look something like this:
Bandit is also the best first step if you’re interested in security work. See Getting Started in Cybersecurity.
Some other useful shell tutorials:
- https://linuxjourney.com/lesson/the-shell
- https://linuxjourney.com/lesson/stdout-standard-out-redirect
Shell tools and scripting
Once you’re comfortable running commands, the next step is stringing them together into scripts so the computer repeats the work instead of you.
Read this introduction to shell tools and scripting from MIT’s Missing Semester.
Try it Do exercises 1, 2, and 3 at the bottom of that page. They cover shell scripting, finding files, and searching text, three things you will use constantly.
Vim
Read this tutorial on using Vim.
Vimtutor is a built-in tool to teach you how to use Vim. From a Linux or Mac command line (if you have a Windows computer, use WSL or a VM) start up vimtutor:
vimtutor
Try it
Complete all of the steps in vimtutor. To save your work, press Esc,
then type :w myVimtutor.txt to save the file. Keep it. It is a useful reference
for the commands you just learned.
Why bother with Vim? Nothing requires you to use Vim. You can write code in any editor you wish. So why learn it? Becoming competent with Vim can make you more productive for the rest of your career.
It is also a good skill to be at least familiar with a terminal text editor. Sometimes you have to SSH into a machine and edit a text file in the terminal, and no graphical editor is available.
If you do decide to make the switch to Vim, understand that it will take a little time to get comfortable with it. For the first two weeks I used Vim, everything seemed to take longer and I was tempted to switch back to my IDE. After two weeks, I had enough of the useful commands memorized and never looked back. Your mileage will vary with this.
Customizing Vim
One of the features that makes Vim so powerful and productive is the ability to
customize it. Without these customizations, I don’t think Vim would be nearly as
productive. Customization involves editing a configuration file (.vimrc) or
installing a plugin.
vimrc
There are two versions of this file. One is the system-wide configuration file;
the location of this depends on which OS distribution you are using. There is
also a file associated with the user located at ~/.vimrc.
To create or edit this file, open it in Vim:
vim ~/.vimrc
Comments in the .vimrc file start with the " character.
My favorite addition to the vimrc file is mapping the jk keys to the escape
key. It is so much faster to hit both of those keys to change modes in Vim than
to reach for the escape key:
inoremap jk <Esc>
I like to see the line numbers, so I add:
set number
Enable syntax highlighting:
syntax on
You can change the default color scheme (change it to whatever you prefer):
colorscheme elflord
Set the tab size:
set tabstop=4
Replace tabs with whitespace. I love this for Python coding:
set expandtab
Highlight lines longer than 80 characters:
let w:m80=matchadd('ErrorMsg', '\%>80v.\+', -1)
set textwidth=80
If you do a web search for Vim customizations, you will find more sources than
you have time to read. A lot of professional developers post their .vimrc file
on GitHub also. Feel free to browse those. But don’t simply copy their file. Make
sure you understand what each line does and decide if you want that as part of
your .vimrc file.
Tabs and split screen
Vim has tabs and split screen features so you can work with multiple files in one terminal.
Split screen
You can split the screen either horizontally or vertically. There are keyboard shortcuts for this:
- Ctrl+w v: split
- Ctrl+w l: move to right window
- Ctrl+w h: move to left window
- Ctrl+w s: split current window again
I find that hitting Ctrl+w is not very comfortable. I
prefer instead, while in command mode, to type :winc. Thus to split the screen,
use :winc v. Another option is to remap these shortcuts in your .vimrc file.
Note that splitting the screen shows the same file in all of the screen splits. Why would you want to do this? Once your file becomes longer than what will fit on a screen, it is often useful to view one part of the file while working on another.
For more tips on using splits, see https://vim.fandom.com/wiki/Switch_between_Vim_window_splits_easily
Tabs
Vim has a tab feature, very similar to tabs in a browser or text editor.
To open a tab, use the command :tabnew. This will open a new empty buffer. To
open a tab with a file, use :tabnew filename.
This page https://vim.fandom.com/wiki/Using_tab_pages lists many options for tab navigation and an option for customizing the shortcuts.
Other tips
The Vim Fandom site has more tips
than you have time to read. It has a nice search feature, so if there is anything
you want Vim to do, you might find it here. One example: when programming C and
C++, you often find yourself switching between the source code (.c or .cpp)
file and the header file. They have many different
solutions
to automate this.
Plugins
To use Vim plugins, it is useful to have a plugin manager. I use Vundle, but others use vim-plug. To install Vundle:
git clone https://github.com/VundleVim/Vundle.vim.git ~/.vim/bundle/Vundle.vim
Then add the following to your .vimrc file:
set nocompatible

" set the runtime path to include Vundle and initialize
set rtp+=~/.vim/bundle/Vundle.vim
call vundle#begin()

" let Vundle manage Vundle, required
Plugin 'VundleVim/Vundle.vim'

" put all of your plugins here
Plugin 'Syntastic'

" All of your Plugins must be added before the following line
call vundle#end()            " required
filetype plugin indent on    " required
After you have added the plugins to your .vimrc file, to install them open Vim
and run:
:PluginInstall
There are plugins like syntax highlighters (now Vim is starting to have IDE-like features):
Plugin 'Syntastic'
NERDTree is a file system explorer for Vim that is very popular:
Plugin 'scrooloose/nerdtree'
If you like the autocomplete feature that many IDEs have, there is a Vim plugin for that:
Plugin 'ycm-core/YouCompleteMe'
There are numerous plugins to help you with specific tasks, like web programming and plugins for specific programming languages. A web search will reveal many.
Try it
Build your own .vimrc. Start with the settings above, keep the ones you like,
and add one thing you found yourself. The point is that every line in it is there
because you chose it.
Automate it with a shell script
To use your favorite Vim configuration on any system, it is helpful to create a
Git repo with your .vimrc file and a script to install it. Here is an example
of my install script:
#!/bin/bash

ln -s `pwd`/vimrc $HOME/.vimrc
mkdir -p $HOME/.vim/bundle
cd $HOME/.vim/bundle
git clone https://github.com/VundleVim/Vundle.vim.git
vim +PluginInstall +qall
This script creates a symbolic link between the ~/.vimrc file and the vimrc
file in the repo directory. Then it installs Vundle and runs the PluginInstall
command in Vim.
The payoff
Once you have a Git repo with your .vimrc file and your shell script,
installing your Vim setup on a brand new computer is:
- clone your repo
cdinto the repo directory- run the script
- Vim now runs with all your customizations
tmux and tiling window managers
It is often very useful to have multiple terminal windows open when coding. You might have one or more open with the source code and another to run commands (compile, make, run the program, run tests, and so on). Some terminal emulators will handle this for you. A better way is to use either tmux or a tiling window manager.
tmux
tmux is a terminal multiplexer. There are several guides for installing and using tmux:
- https://github.com/tmux/tmux/wiki
- https://linuxize.com/post/getting-started-with-tmux/
- https://www.hamvocke.com/blog/a-quick-and-easy-guide-to-tmux/
- https://www.hamvocke.com/blog/a-guide-to-customizing-your-tmux-conf/
Optional, like Vim Nothing requires you to use tmux. It is another tool that can make you more efficient if you take the time to learn it.
If you do decide to customize tmux, add the .tmux.conf file to your repo and
modify your installation script:
#!/bin/bash

ln -s `pwd`/tmux.conf $HOME/.tmux.conf
ln -s `pwd`/vimrc $HOME/.vimrc
mkdir -p $HOME/.vim/bundle
cd $HOME/.vim/bundle
git clone https://github.com/VundleVim/Vundle.vim.git
vim +PluginInstall +qall
Now you have one script to configure Vim and tmux on any new machine you work on.
Tiling window managers
A tiling window manager organizes windows in a similar fashion to tmux, but it does this for all the windows, not just terminal windows. For Linux distributions, you will have many choices of different tiling window managers. For Mac and Windows, the choices are more limited, but there are options.
I have used the i3 window manager for years and love it. This manager is easy to customize (just edit a config text file), and there is plenty of online support to help. The biggest downside at first was not having the normal menus to open programs (I had to get used to dmenu), and many GNOME desktop programs are not available when in i3 mode. Also, some programs like Zoom sometimes behave oddly using i3.
There is a Linux distribution called Regolith Linux that comes with i3 pre-installed and pre-configured. One of its best features is that it provides access to all the GNOME programs that weren’t available in the basic i3 setup.
There are numerous tiling window managers to choose from:
And many more. Each has different features and keyboard shortcuts.
Which is better, tmux or a tiling window manager? It depends. tmux is available on almost any system, but only manages shell windows. A tiling window manager requires installation permissions, sometimes as root, so on a lab or work machine you may not have the option. Which is better (if either) depends on your situation.
Git
Git is an open source version control system. It is the most common version control system used in industry and academics. Learning Git is a critical skill for your career in computer science.
Git servers
Git itself is simply software. When we think about Git, though, we often think about specific websites, like GitHub. You can run your own Git server instead of using these websites. There are numerous websites that host Git for you. The three most popular are:
Installing Git on your local machine
To use any Git server, you also need the Git software installed on your local machine. These instructions will show you how to install Git on your personal computer.
Learning and using Git
The Git commands are issued in a terminal command line interface, though Windows does have a GUI version and the Git commands are integrated into various IDEs. For example, here are the instructions for Git integration with VS Code.
Learn the commands first Even if your code editor has Git integrations, I strongly suggest that you use the terminal command line at first, so you learn the commands. When the GUI does something confusing (and it will), knowing what it is actually running is what gets you unstuck.
Basic Git commands
The following are the basic commands commonly used with Git repos:
git clone: fetch a copy of a remote repositorygit add: add a new file and/or directory to the local repositorygit commit: commit changes to the local repositorygit push: merge changes from the local repository to a remote one. Implicitly assumesorigin(the place you retrieved the repo from) andmain(branch)git pull: merge changes from the remote repository to your local one. Same implicit assumptions aspushgit status: I find this one very helpful for troubleshooting, or just checking that the files added withgit add .are the files I actually wanted added to my repo
Git tutorials
Several sites already have good tutorials, so I will simply provide links:
- https://git-scm.com/doc
- https://docs.github.com/en/get-started/quickstart/set-up-git
- http://rogerdudler.github.io/git-guide/
- https://learngitbranching.js.org/
- https://www.freecodecamp.org/news/git-cheat-sheet-and-best-practices-c6ce5321f52
- https://product.hubspot.com/blog/git-and-github-tutorial-for-beginners
Try it This tutorial from GitHub is a good hands-on introduction to most of the Git commands you need to learn: https://github.com/skills/introduction-to-github
Going further: continuous integration
Slightly more advanced usage of a Git server involves continuous integration: https://github.com/skills/continuous-integration
Continuous integration usually involves automation. For example, a common automated task is running tests. These can be unit tests or other tests that you create. Any time code is pushed, the CI will automatically run them.
Credit Portions of this page are adapted from MIT’s The Missing Semester of Your CS Education, used and shared under CC BY-NC-SA.